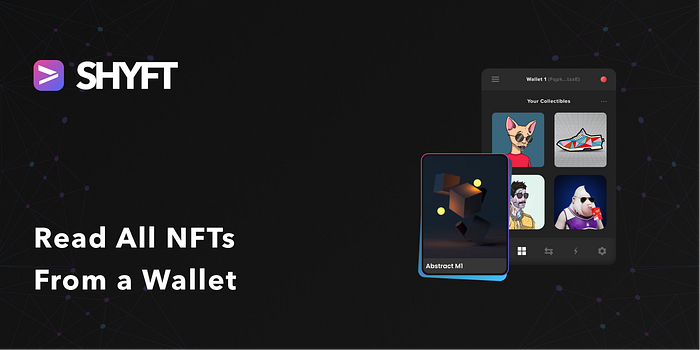
Shyft makes it very easy to read all NFTs from a Solana wallet
We will create a simple website that displays all the NFTs in a wallet. We can do this by using 1 single Shyft API:
We must have a few things in place before we dive into reading wallets. These are:
- Installed browser extension for Phantom Wallet. Refer here to install it.
**npm**and**npx**installed in your programming environment. If not already set up, refer here.
Coding begins
First things first.
Get your Free Shyft API key
You need to get your API key to create the NFT. Head here
and receive the API key in your email id.
Setup react project
$ npx create-react-app my-first-nft-dapp
This creates the boilerplate code for your Dapp.
Updating package.json
Update the newly generated **package.json** dependency section and add:
"dependencies": { ... "@solana/wallet-adapter-phantom": "^0.9.7", "@solana/web3.js": "^1.50.0", "axios": "^0.27.2", ... },
These dependencies are needed to make http requests and connect to the phantom wallet.
Connecting to the Phantom wallet
Let’s create a new file under the **/src** directory called **ListAll.js**.
Now put the code snippet below, in this file.
import { useState } from "react";import axios from "axios";import { clusterApiUrl, Connection, PublicKey } from "@solana/web3.js";import { PhantomWalletAdapter } from '@solana/wallet-adapter-phantom';const ListAll = () => { const xKey = "<YOUR_API_KEY>"; const [wallID, setWallID] = useState(""); const [network, setNetwork] = useState("devnet"); const [isLoaded, setLoaded] = useState(false); const [dataFetched, setDataFetched] = useState(); const [connStatus, setConnStatus] = useState(false);// Phantom Adaptor const solanaConnect = async () => { console.log('clicked solana connect'); const { solana } = window; if (!solana) { alert("Please Install Solana"); }try { //const network = "devnet"; const phantom = new PhantomWalletAdapter(); await phantom.connect(); const rpcUrl = clusterApiUrl(network); const connection = new Connection(rpcUrl, "confirmed"); const wallet = { address: phantom.publicKey.toString(), };if (wallet.address) { console.log(wallet.address); setWallID(wallet.address); const accountInfo = await connection.getAccountInfo(new PublicKey(wallet.address), "confirmed"); console.log(accountInfo); setConnStatus(true); } } catch (err) { console.log(err); }} return ();};
Also, put your generated API key in a variable **xKey**.
The above snippet has a function **solanaConnect()** that connects to the phantom browser extension.
Creating Wallet connect UI component
Now let’s create a simple UI button to that allows a user to connect the phantom wallet. This UI component will invoke the **solanaConnect()** a function that we created in the previous step.
Get Team Shyft’s stories in your inbox
Join Medium for free to get updates from this writer.
In **ListAll.js** place the below JSX code snippet inside the **return()** function
<div className="grd-back"> <div className="container-lg"> <div className="py-4 text-center"> <h1>List All Your NFTs</h1> <p> This is a sample project which will list all your NFTs associated with your wallet </p> </div> </div><div className="container-lg"> {!connStatus && (<div className="card border border-primary rounded py-3 px-5 w-50 mx-auto"> <div className="card-body text-center"> <h2 className="card-title p-2">Connect Your Wallet</h2> <p className="card-text p-1">You need to connect your wallet to deploy and interact with your contracts.</p> <button className="btn btn-primary mt-5 px-3" onClick={solanaConnect}>Connect Phantom Wallet</button> {/* <select className="form-select" onChange={(e) => { console.log(e.target.value); (e.target.value === 'mtmsk') ? mtmskConnect() : solanaConnect(); }}> <option value="none">Connect</option> <option value="phntm">Phantom</option> </select> */} </div> </div>)} {connStatus && (<div className="w-50 border border-primary rounded-3 mx-auto"> <div className="form-container p-3"> <form> <div className="row d-flex justify-content-center"><div className="col-12 p-2"> <select name="network" className="form-control form-select" id="" onChange={(e) => setNetwork(e.target.value)} > <option value="devnet">Devnet</option> <option value="testnet">Testnet</option> <option value="mainnet-beta">Mainnet Beta</option> </select> </div> <div className="col-12 p-2"> <input type="text" className="form-control" placeholder="Enter Wallet Id" value={wallID} /> </div></div> <div className="text-center p-3"> <button className="btn btn-primary" onClick={fetchNFTs} > Get </button> </div> </form> </div> </div>)} </div><div className="container-lg"> <div className="cards-section py-4"> <div className="row"> {isLoaded && dataFetched.result.map((item) => ( <div className="col-xs-12 col-sm-3 p-3" key={item.mint}> <div className="card nft-card"> <div className="card-body"> <a href={`/get-details?token_address=${item.mint}&apiKey=${xKey}`} target="_blank" rel="noreferrer"> <img className="img-fluid" src={item.image_uri} alt="img" /> </a> <a href={`/get-details?token_address=${item.mint}&apiKey=${xKey}`} target="_blank" rel="noreferrer"> <h5>{item.name}</h5> </a> </div> </div> </div> ))}</div> </div> </div></div>
Adding the REST Call
It’s time to invoke the almighty **read_all** Shyft’s API to read the NFTs in a wallet.
To do this create another function **fetchNFTs()** , inside the **ListAl()** function.
const fetchNFTs = (e) => { e.preventDefault();//Note, we are not mentioning update_authority here for now let nftUrl = `https://api.shyft.to/sol/v1/nft/read_all?network=${network}&address=${wallID}`; axios({ // Endpoint to send files url: nftUrl, method: "GET", headers: { "Content-Type": "application/json", "x-api-key": xKey, }, // Attaching the form data }) // Handle the response from backend here .then((res) => { console.log(res.data); setDataFetched(res.data); setLoaded(true); })// Catch errors if any .catch((err) => { console.warn(err); }); };
The final code **ListAll.js** can be found here.
Update App.js
Before we can run the project the last thing we have to do is to modify our **App.js** file:
import { BrowserRouter as Router, Route, Routes } from "react-router-dom";import ListAll from "./ListAll";function App() { return ( <div className="App"> <Router> <Routes> <Route exact path="/" element={<ListAll />} /> </Routes> </Router> </div> );}export default App;
It’s Showtime now…
Let’s run this app by running, on a console.:
**npm start**
Head over to your localhost and you will see a simple UI like this one:
Press enter or click to view image in full size
Wallet connect action box
Go ahead and connect your wallet, on the successful connection you will be prompted to choose a **Solana network**
Press enter or click to view image in full size
Network Selection
After selecting your desired network, hit **get**. And there you go, all your NFTs will be visible to you.
Press enter or click to view image in full size
All NFTs available in your wallet
We have already created this project for you to play around with, with a good-looking UI. The entire source code is available in this repository https://github.com/Shyft-to/list-all-nfts-from-wallet. Make sure you FORK it and have fun playing around with it.
Also, this dapp is already deployed and available here. Congratulations now, you are one step closer to creating super flexible web3 dapps, for your users.
A lot more tutorials coming up, to help developers create super powerful dapps, quickly.
STAY TUNED!!
Resources
Thank you for your time. Happy hacking
Related Posts

How to track all $Booty token swaps in one hour on Orca
In this article, we will explore an intuitive way of tracking all $Booty token swaps in an hour on Orca, powered by SHYF...
January 22, 2026
How to update metadata URI for an NFT on Solana
NFT Metadata is the unique properties or details which make an NFT different from each others. In this article, we will ...
January 22, 2026
How to Redeem Solana Loyalty Tokens on eCommerce Website(Part 3)
Loyalty-based eCommerce websites have grown popular in recent years. This article illustrates how to let users of an eCo...
January 22, 2026
Get in touch with our discord community and keep up with the latest feature
releases. Get help from our developers who are always here to help you take off.